This post may contain affiliate links. Please read our disclosure policy.
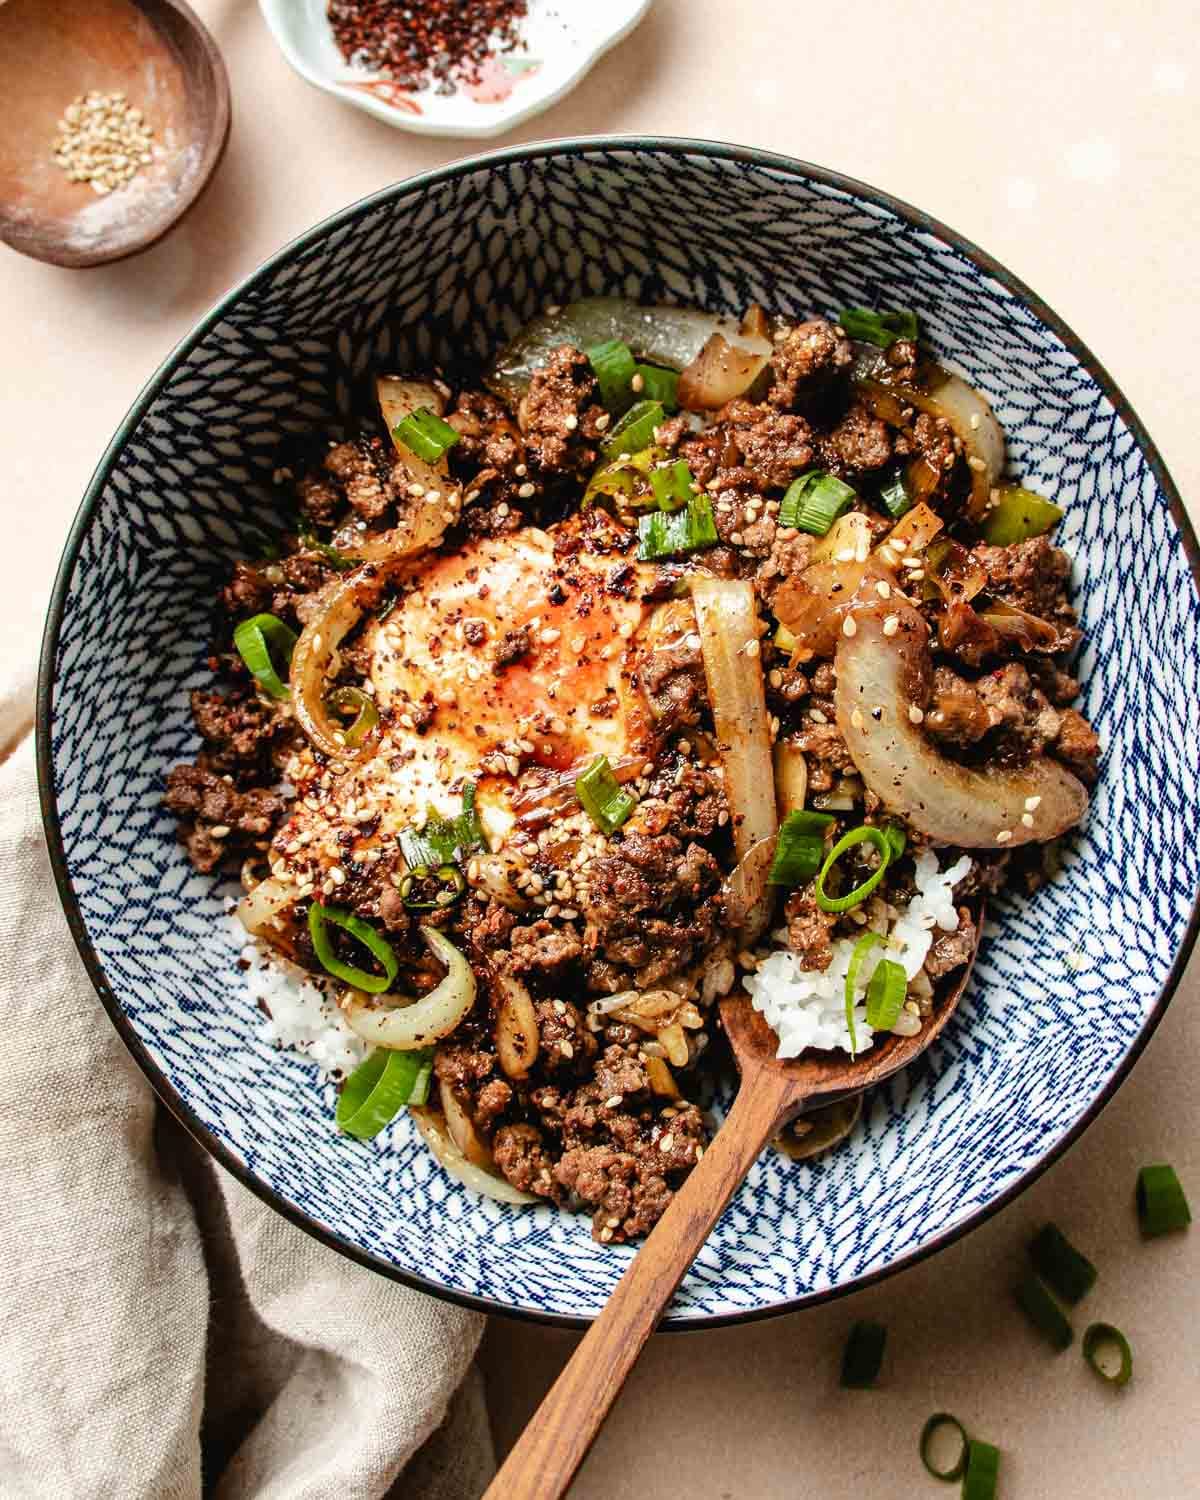
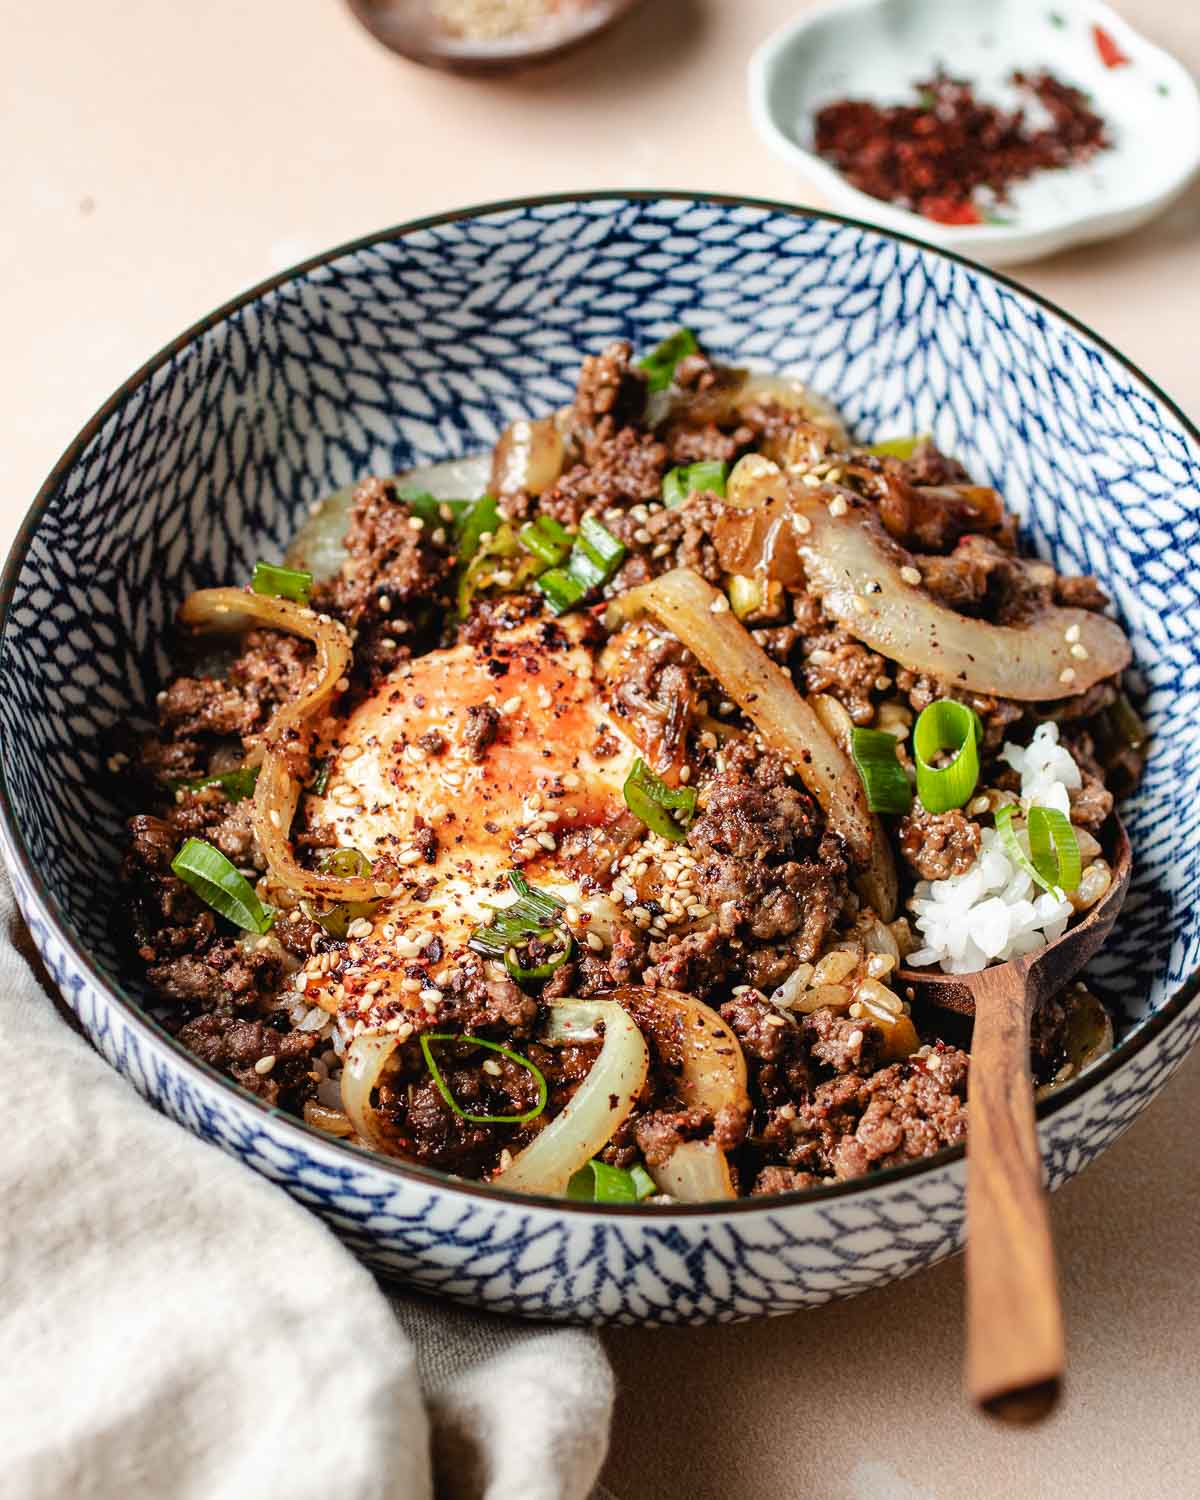
This ground beef bulgogi is saucy, glossy, and packed with bold flavor that clings to every bite. It tastes like you spent hours cooking—but it all comes together in under 30 minutes, in just one pan.
We skip the overnight prep and go straight into cooking with a punchy bulgogi sauce that’s perfectly balanced—sweet, savory, and full of umami. I even steam soft eggs right in the pan for extra protein and richness. My husband went back for thirds the first time I made it. It’s everything you want in a cozy bulgogi bowl, made simpler and faster for weeknights.
Key ingredient highlights
This is a quick bulgogi-style ground beef, so there’s no need to marinate the meat overnight. Instead, a few bold ingredients bring big flavor fast. These are the key highlights—check the full recipe card below for exact quantities and instructions.
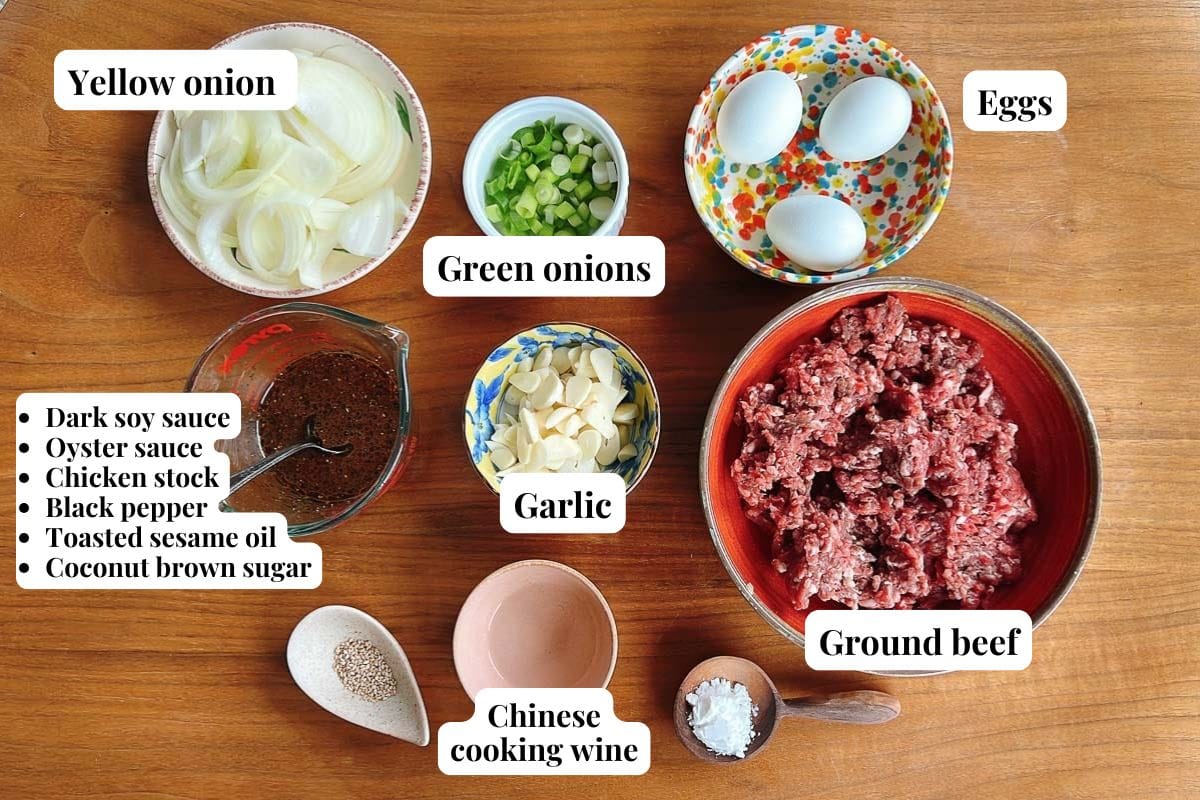
- Ground beef (80% to 85% lean): I recommend using grass-fed beef because it tends to be leaner, which helps keep the dish from getting too greasy. At the same time, choosing an 80% to 85% lean blend gives you just the right amount of fat to keep the beef juicy and flavorful—without it swimming in oil.
- Dark soy sauce + oyster sauce: Because we’re skipping the marination, we need sauces that already pack a punch. Dark soy sauce gives the meat a beautiful color and adds a subtle caramel flavor. Oyster sauce is loaded with umami and has a naturally glossy texture that clings to the meat and makes every bite taste extra rich and savory. Together, they create that deep bulgogi flavor—no overnight soak required.
- Coconut brown sugar: Just a touch of sugar helps balance the savory notes. I use coconut brown sugar here because it melts in easily and adds sweetness without being overpowering. It keeps the flavor well-rounded and smooth.
- Chinese cooking wine or gluten-free cooking sake: A small splash goes a long way. It helps bring out the aroma of the aromatics, and it also “cleans up” the flavor of the beef—especially if you find ground meat sometimes tastes too heavy or “meaty.” The wine burns off during cooking, so you won’t taste it, but you’ll notice the difference in how bright and clean the dish tastes.
How to make ground beef bulgogi
This dish comes together fast, but if you’ve ever had bulgogi beef that turned out dry, bland, or watery—chances are the problem happened during the cooking steps. Here’s how to avoid that.
- Start with garlic and green onions to build flavor
This is the first layer of flavor. By sautéing garlic and scallion whites in oil first, you’re creating a fragrant base that makes the whole dish taste better. I recommend using a larger sauté pan so everything cooks more evenly and faster—especially for a full pound of ground beef.- Tip: We cook over medium heat, which is important. You don’t want the beef to turn crumbly or dry (which can happen if the pan’s too hot), but you also don’t want it too cool or the meat will steam. Medium heat gives just enough control—you get a saucy beef with a light sheen, not something watered down or greasy.
- How to keep ground beef juicy—not dry or crumbly
This is one of the most common mistakes. We’re using medium heat here for a reason—to keep the beef juicy and prevent it from drying out too fast, especially if you’re using leaner, grass-fed ground beef.
As the beef cooks, break it into small bits—the finer the better. This helps the meat soak up the sauce more evenly, so you get flavorful bites instead of bland chunks. You want the texture soft and saucy, not overly dense or chewy.
- Add onions for sweetness and depth
Onions are key to traditional Korean bulgogi. As they cook, they turn soft, slightly translucent, and release natural sweetness. That mellow flavor is exactly what helps make bulgogi taste like bulgogi.
You don’t need to fully brown them—just sauté until they start softening. We’ve still got a few more steps coming, so the onions will continue to cook along the way. - Why I added eggs—and how to simmer them right
Eggs aren’t a must in bulgogi bowls, but I wanted to add something extra—more protein, more nutrition, and more flavor. Plus, the idea of jammy, slow-simmered eggs in a garlicky-sweet bulgogi sauce? It just sounded too good to pass up.
Simmer the eggs right in the center of the pan while the beef finishes cooking around the edges. Cover the pan and cook until the whites just set—I like to keep the yolks a little runny so they blend right into the sauce when you break them open.
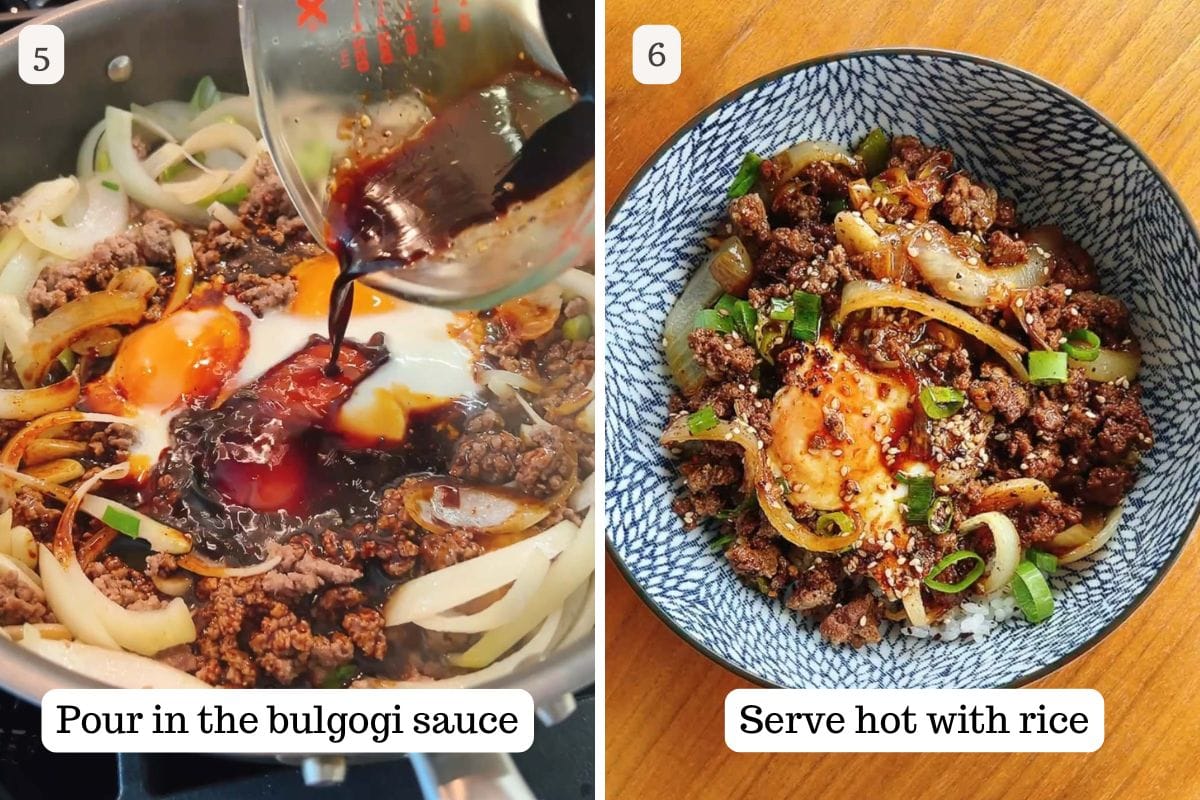
- Add the bulgogi sauce for glossy, saucy beef
Once the eggs are done, pour in the sauce—it’s bold, savory, just slightly sweet, and full of umami. The beef soaks it right up and gets super flavorful fast, even without a marinade.- TIP: To help the sauce cling to the meat and thicken up, don’t skip the starch slurry. It only takes a little, but it gives the beef that perfect, glossy texture. You don’t want to cook it down too much—we want the sauce to stay a bit loose so you can spoon it over hot rice. That’s what makes every bite juicy and satisfying.
- TIP: To help the sauce cling to the meat and thicken up, don’t skip the starch slurry. It only takes a little, but it gives the beef that perfect, glossy texture. You don’t want to cook it down too much—we want the sauce to stay a bit loose so you can spoon it over hot rice. That’s what makes every bite juicy and satisfying.
Vegetables and Topping Ideas
To turn your ground beef bulgogi into a full, satisfying bowl, here are some of my favorite vegetables, toppings, and sides to mix and match.
- Kimchi always works well. Try it with my napa cabbage kimchi for bold, classic flavor or cucumber kimchi if you want something crisp and refreshing to balance the beef.
- Pickled sides and savory toppings also make a great combo. Add a scoop of Korean cucumber salad, some pickled daikon, or a few slices of pickled garlic.
- As for the base, I recommend serving it over short grain white rice cooked in a rice cooker. The grains soak up the beef juice beautifully. Boiled noodles work too, and if you’re looking for a lower-carb option, my shirataki rice is a great swap.
ChihYu’s helpful notes
- Keep it saucy—not soupy or dry. Aim for that glossy texture with a little sauce pooling in the pan. You don’t want it watery, but you also don’t want to dry everything out. Medium heat and a quick slurry finish keep things just right.
- Break the beef into small bits. The finer the beef, the better it absorbs the sauce. This makes every bite flavorful and gives you that traditional bulgogi texture, even with ground meat.
- Undercook the eggs slightly—they’ll finish on their own. I simmer the eggs just until the whites are barely set (about 3 to 4 minutes). After that, we’re still adding the sauce and slurry, so the eggs continue cooking. If you wait too long, the yolks will turn solid. Want a jammy yolk? Slightly undercook, then cover the pan and let the residual heat finish them off naturally.
Try these Korean beef recipes next!
- Kalbi (Korean short ribs)
- Air fryer Korean short ribs (boneless version!)
- Asian ground beef macaroni
- Bulgogi bibimbap (coming soon!)
Ground beef bulgogi recipe

Video
Ingredients
Bulgogi ground beef:
- 6 oz yellow onion thin sliced, half of 1 large
- 1 oz garlic cloves thin sliced, 7 large
- 3-4 bulb green onions
- 1 tbsp avocado oil
- 1 lb ground beef 80% or 85% lean
- ½ tsp coarse sea salt
- Splash Chinese cooking wine or gluten-free Japanese cooking sake
- 3-4 large eggs cracked
Bulgogi Sauce:
- 2.5 tbsp dark soy sauce
- 1 tbsp oyster sauce
- 3 tbsp chicken stock
- ⅛ tsp freshly ground black pepper
- ½ tbsp toasted sesame oil
- 1 tbsp coconut brown sugar
Slurry:
- 2 tsp tapioca starch or potato or arrowroot
- 2 tbsp water
Garnish:
- Toasted white sesame seeds
- Gochugaru flakes optional
Instructions
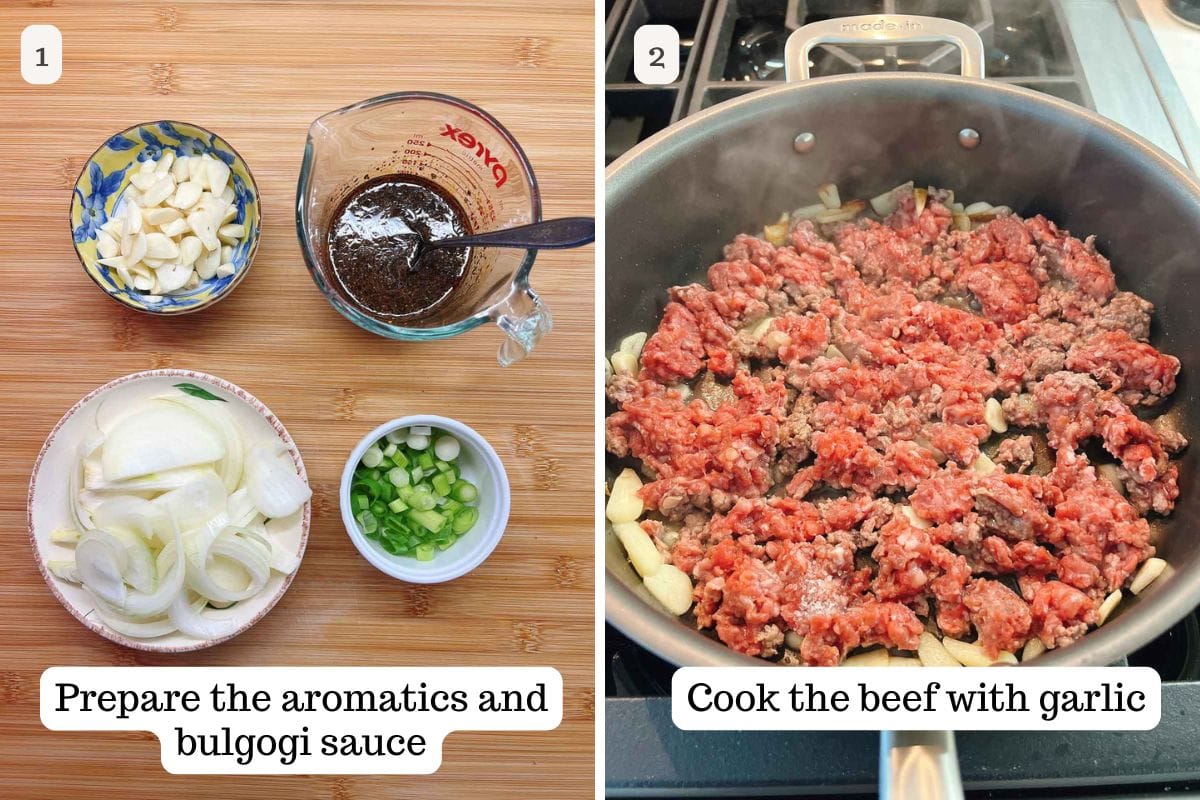
- Prep the aromatics: Thinly slice the onion and garlic. Dice the green onions into small rounds and separate the white and green parts. Set aside.
- Brown the beef: In a large (12-inch) sauté pan, preheat over medium heat until it feels quite warm. Add the oil and sliced garlic. Sauté quickly for 5 to 6 seconds. Add the ground beef and use a wooden spoon to break it into smaller bits. You should hear a sizzle—if not, increase the heat slightly. Season with salt and cook over medium heat for 3 minutes.
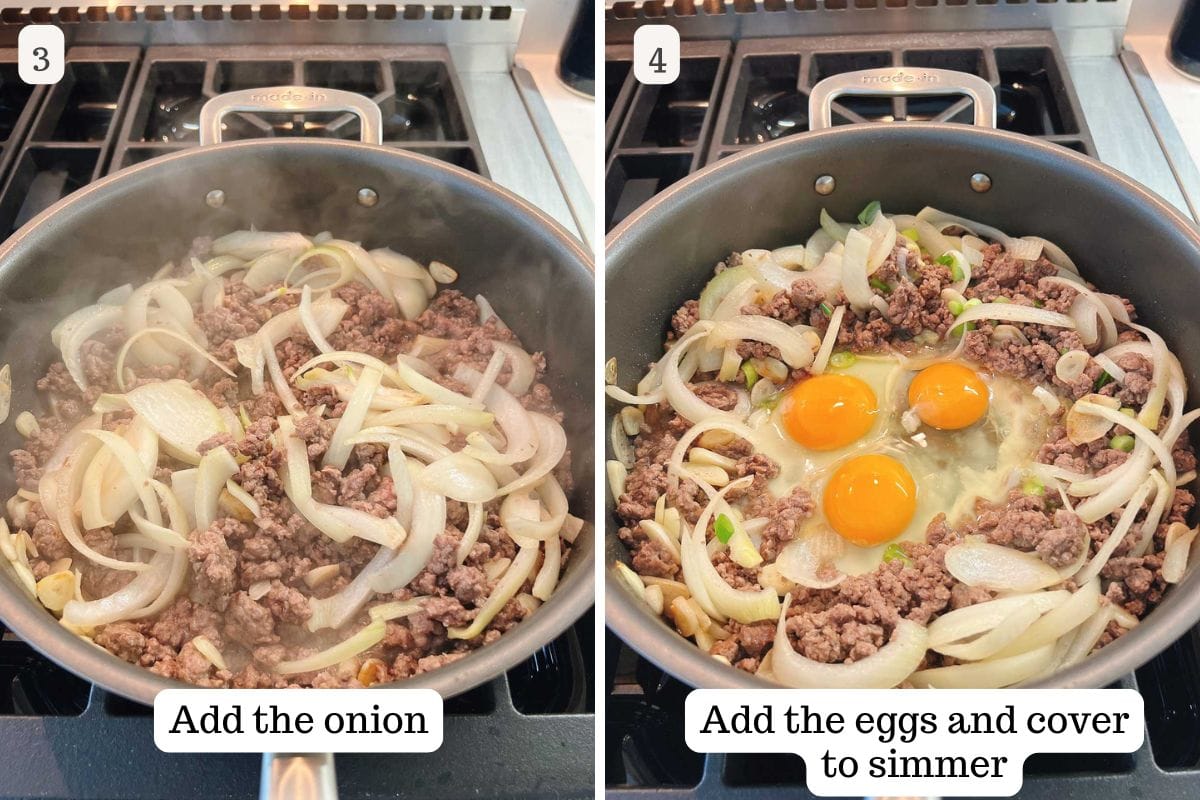
- Add onions and scallions: While the beef is still slightly pink, add the onion and continue sautéing until the beef is no longer pink, the meat is broken into finer bits, and the onion becomes soft and slightly translucent, about 2-3 minutes. Add the white scallion parts and a splash of cooking wine. Stir to combine.
- Cook the eggs: Push the beef to the sides of the pan, leaving the center open. Slide the cracked eggs into the center. Cover the pan with a lid and reduce the heat to medium-low. Let the eggs “simmer” until your desired doneness. (For reference: I simmered mine for 3-4 minutes, just until the egg whites were set.) Slightly undercooked eggs are best to prevent overcooking.
- Make the sauce and slurry: While the eggs are cooking, assemble the bulgogi sauce in a small bowl (from dark soy sauce to coconut sugar). Stir well. In another small bowl, combine the starch and water to make the slurry.
- Add sauce and finish: Once the eggs are done, pour in the bulgogi sauce and distribute evenly. Stir the slurry again before adding it to the pan. The sauce should thicken in about 30 seconds. Turn off the heat.
- Garnish and serve: Garnish with the green parts of the scallions, toasted sesame seeds, and gochugaru flakes (if using). Serve hot or warm with a bowl of steamed rice.
Notes
- For saucier results: Use medium heat and give the beef time to release its natural juices. This creates that flavorful sauce that soaks right into your rice—no dry meat here.
- The finished dish should have a soft, saucy texture with a light glossy coating. You want just enough sauce to spoon over rice—not too thick, not too loose.
- Coconut aminos substitution: Coconut aminos are about ⅓ as salty as light soy sauce. If using them, check out my Paleo Beef Bulgogi Bowl for the right ratios.
- Different protein options: You can also use ground chicken (50% lean and 50% dark meat) or extra firm tofu (press the water out and crumble).
- Grass-fed beef tips: Grass-fed ground beef tends to be leaner. I use 80% lean | 20% fat. 85% lean also works well.
- Make-Ahead, Storage, Freeze & Reheat:
- Make-ahead: You can make the entire dish ahead of time. It stores well and reheats beautifully—perfect for meal prep.
- Storage: Keep leftovers in an airtight container in the fridge for up to 4 days.
- Reheat: Reheat in a skillet over medium-low heat with a splash of water or stock to loosen the sauce. Microwave works too—cover and heat in short intervals until warmed through.
- Freeze: Freeze the cooked beef mixture (without the egg) for up to 2 months. For quicker defrosting, store the meat flat (not in a thick chunk) in a freezer-friendly bag—this helps it thaw faster and more evenly.
Nutrition
Nutrition information is automatically calculated, so should only be used as an approximation.
Made a dish and loved it? Please rate the recipe and leave a comment in the section below! It helps my blog grow organically, allowing me to continue sharing free and awesome content with you. Thank you!


I was looking for a quick and easy recipe to make that did not require a grocery store run amd this one fit the bill! Love that this is a recipe where the ingredients are ones that are already on-hand. The recipe was a hit and will be added to my regular rotation.
Thank you so much for making the dish. I’m so happy to hear! 🙂